
How to fry chicken crispy without flour comes down to two things people usually underestimate, moisture control and a coating that can actually set and brown in hot oil.
If you have celiac disease, you’re doing low-carb, or you just ran out of all-purpose flour, the good news is you can still get that crackly, shattery bite, but you can’t treat it like a normal dredge-and-fry. The “why” matters here, because tiny tweaks like salting time and oil temperature decide whether you get crunch or a sad, soft crust.
This guide walks through the coatings that work, how to set up a reliable frying station, and a few rescue moves when the coating slides off. You’ll also get a quick table to pick the right flour-free option for your pantry and diet.
Why flour-free fried chicken turns soggy (and how to stop it)
Most “not crispy” outcomes trace back to the same culprits, water, weak adhesion, and oil that’s either too cool or too hot.
- Wet surface = steam = soft crust. Chicken releases moisture as it cooks. If the coating isn’t strong enough to set fast, steam softens it from underneath.
- Coating doesn’t stick. Flour usually acts like a primer. Without it, egg or buttermilk alone often forms a slick layer, then the crust slips.
- Oil temperature swings. Crowding the pan drops the temperature, which encourages oil absorption and a heavy crust.
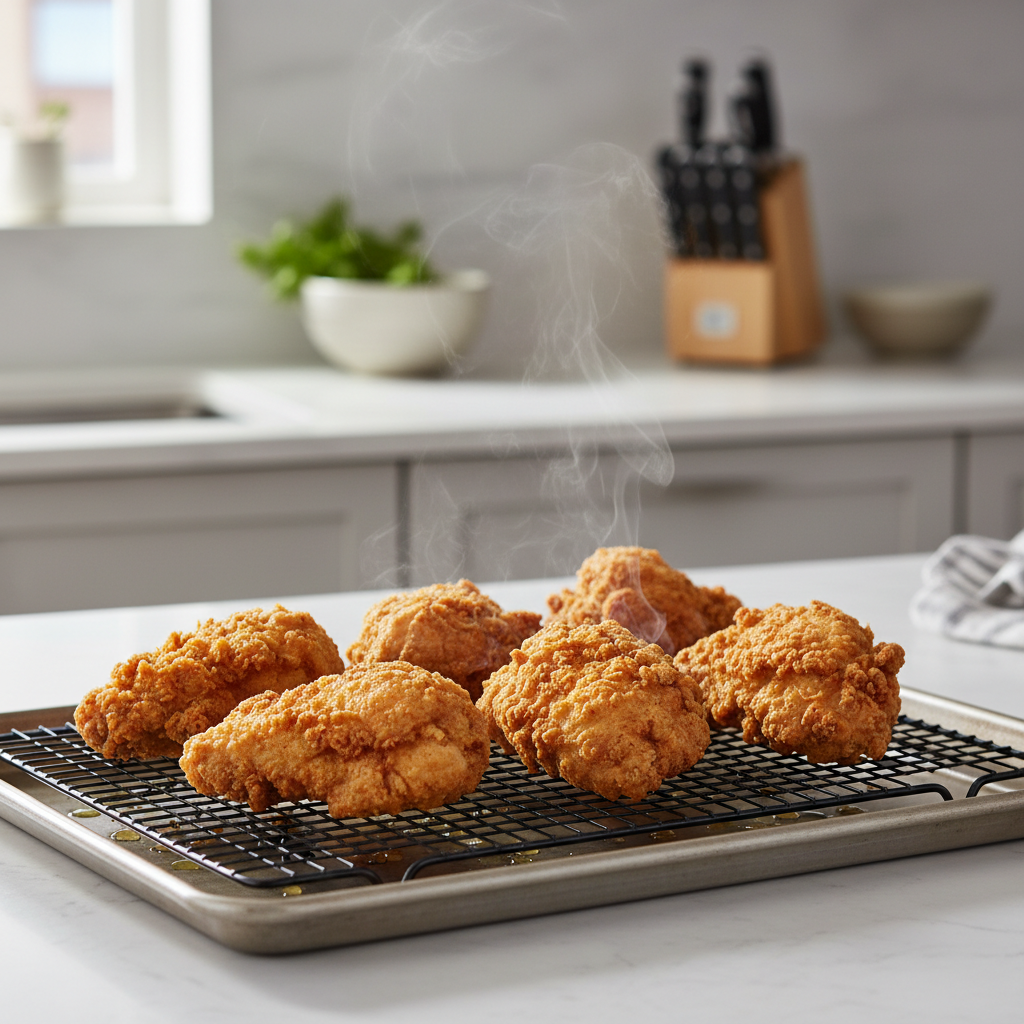
- Resting wrong after frying. Paper towels trap steam against the crust. A rack keeps airflow so crunch stays.
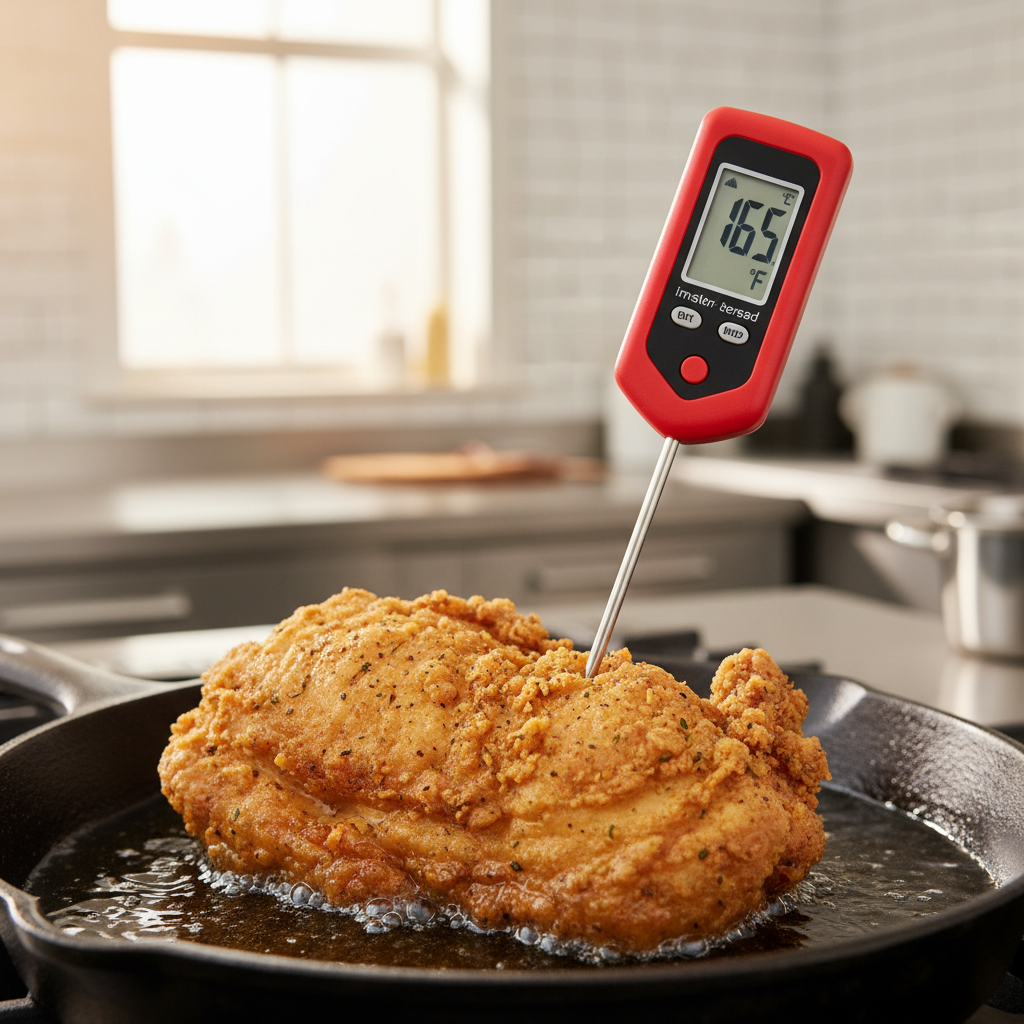
According to USDA Food Safety and Inspection Service, poultry should reach 165°F internal temperature for safety. The trick is getting there without overcooking the exterior, which is why temperature control matters as much as coating choice.
Best flour substitutes for crispy fried chicken (quick comparison table)
There isn’t one “perfect” replacement, because texture and browning differ. Here’s the practical cheat sheet.
| Coating (no flour) | Crunch level | Best for | Notes |
|---|---|---|---|
| Cornstarch | Very crisp, light | Wings, tenders | Browns fast, can go from golden to dark quickly |
| Potato starch | Extra crunchy | Ultra-crisp “karaage” style | Great shatter, needs hot oil and good draining |
| Rice flour | Crisp, dry | Pan-fry and deep-fry | Clean crunch, less greasy feel |
| Crushed pork rinds | Crunchy, thicker | Keto | Flavorful, can brown unevenly, press on firmly |
| Parmesan + spices | Frico-style crisp | Shallow fry/air fry | Can burn at high heat, watch temperature |
If your goal is classic “fried chicken” crunch with minimal fuss, many home cooks find cornstarch or potato starch the most forgiving.
A simple method that works: starch + seasoned wet dip + rest
How to fry chicken crispy without flour is easier when you commit to a repeatable workflow. This version uses starch (not wheat flour) and a quick rest so the coating bonds.
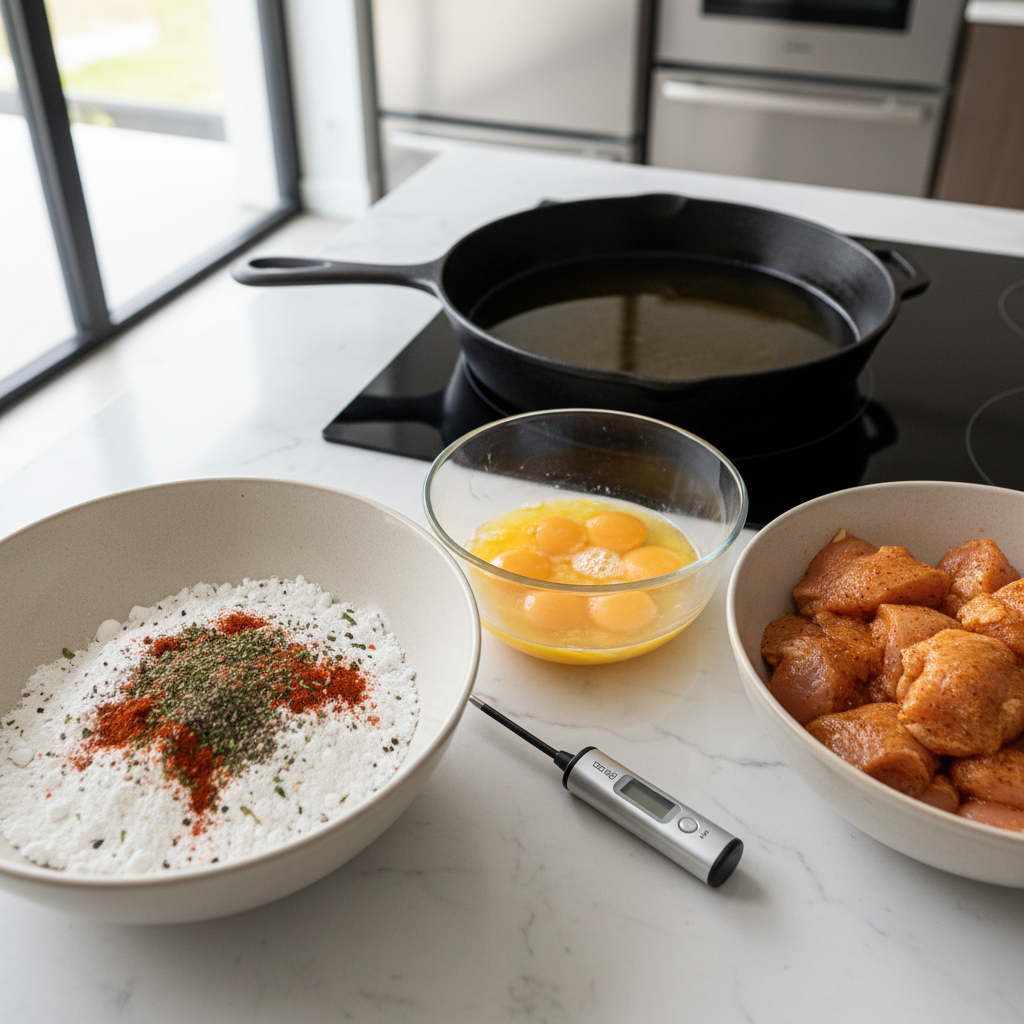
What you’ll need
- Chicken pieces (thighs, drumsticks, wings, or tenders)
- Cornstarch or potato starch (start with 1 to 1.5 cups)
- Wet dip: beaten eggs, or buttermilk, or plain yogurt thinned with water
- Kosher salt, black pepper, paprika, garlic powder, cayenne (optional)
- Neutral high-heat oil (peanut, canola, sunflower)
- Wire rack + sheet pan, thermometer (highly recommended)
Step-by-step
- Dry and salt the chicken. Pat very dry, salt generously, then let it sit 15–30 minutes. If you have time, chill it uncovered in the fridge for 1–2 hours to dry the surface even more.
- Season the starch. Mix starch with pepper, paprika, garlic powder, and a pinch of salt. Starch alone tastes flat.
- Dip, then dredge. Coat chicken lightly in the wet dip, let excess drip off, then press into the starch. Pressing matters, it’s how you create those craggy edges.
- Rest the coated chicken. Place on a rack 10–15 minutes. This step looks optional and then saves your day, it helps the coating hydrate and adhere.
- Fry at a steady temp. Aim for about 325–350°F depending on cut size. Fry in batches so oil temperature doesn’t crash.
- Drain on a rack, not paper towels. Keep airflow around the crust.
Key point: If you skip the rest and toss freshly coated chicken straight into oil, the crust is more likely to shed, especially with boneless pieces.
Oil temperature and timing: the difference between “golden” and “greasy”
You can have the right coating and still miss the texture if the oil temperature isn’t stable. Many “it’s not crispy” complaints are really “my oil ran cold.”
- Use a thermometer. Guessing works until it doesn’t, and starch-based coatings brown fast.
- Don’t crowd the pan. Leave space so oil rebounds quickly after you add chicken.
- Match heat to cut. Wings and tenders tolerate hotter oil, bone-in thighs often need slightly lower heat so the center cooks through.
- Finish internal temp safely. According to USDA Food Safety and Inspection Service, cook poultry to 165°F. If the exterior browns early, lower heat and give it time, or finish briefly in a 350°F oven.
If you’re shallow frying, keep oil at least 1/2 inch deep and flip carefully. Uneven oil depth often creates pale patches and soft spots.
Self-check: what’s causing your coating to fall off?
Before you change ingredients, diagnose the failure. This quick checklist usually points to the fix.
- Crust slides off in sheets: chicken surface was too wet, or you skipped the resting step, or your wet dip was too thick and slick.
- Crust is crisp at first, then soft: drained on paper towels, covered too soon, or chicken sat in a closed container while hot.
- Crust tastes chalky: too much starch, not enough seasoning, or oil temperature too low so the coating never “sets.”
- Dark outside, undercooked inside: oil ran too hot, pieces too large, or you fried straight from the fridge with very cold centers.
- Patchy coating: you didn’t press the coating on, or you moved the chicken too soon in the oil before it sealed.
Practical variations for different diets and pantries
Once you understand the mechanics, you can adapt without losing crunch.
Gluten-free but classic crunch
- Use potato starch or a 50/50 mix of potato starch and rice flour.
- Add baking powder only if your blend needs lift, and keep it modest so the coating doesn’t taste alkaline.
Keto/low-carb
- Crushed pork rinds + spices works well, but press firmly and fry gently so it browns evenly.
- Consider a quick oven finish if pieces brown early.
No eggs
- Try buttermilk or yogurt thinned to a pourable consistency.
- Let excess drip off, too much liquid leads to gummy spots.
Extra “craggy” texture without flour
- After dredging, pinch and press a few small clumps of starch onto the surface.
- Rest on a rack so those bits bond before frying.
Common mistakes that quietly ruin crispiness
- Washing chicken in the sink. It adds water and can spread bacteria around the kitchen. According to USDA Food Safety and Inspection Service, washing raw poultry is not recommended because it can increase cross-contamination risk.
- Using extra-virgin olive oil. Flavor and smoke point usually make it a poor fit for frying.
- Seasoning only after frying. You’ll get surface salt, but not depth. Season the coating too.
- Moving chicken too early. Let the first side set before flipping, or the coating sticks to the pan.
- Storing hot chicken in a closed container. Steam is the enemy, cool on a rack first.
When it’s worth asking a pro (or at least playing it safe)
If you’re cooking for someone with celiac disease or severe allergies, ingredient labels and cross-contact matter as much as technique. Starches and spice blends can be processed in shared facilities, and that may be a concern in many situations.
If you’re unsure about safe handling, oil safety, or doneness, consider using an instant-read thermometer and reviewing USDA food safety guidance, and if a medical diet is involved, it can be smart to consult a qualified clinician or registered dietitian for personalized advice.
Conclusion: the repeatable formula for flourless crunch
If you keep one idea in mind, it’s this, dry chicken + starch coating + a short rest + steady oil heat usually beats any fancy ingredient. That’s the backbone behind how to fry chicken crispy without flour without feeling like you’re gambling each batch.
Pick one coating from the table, run the same workflow twice, and take notes on oil temperature and resting time. Your second attempt tends to be dramatically better, and you’ll start dialing in the exact crunch you like.